9 min read
Shire: 10G Home Network Buildout
Oh the things you can do with enterprise kit in a residential environment
- home-infra
- networking
Several factors finally pushed me to do an overhaul of my home network.
Dead Zones
The house is sprawling, and my Eero mesh that worked great in my apartment had poor penetration, no matter how I positioned nodes. The Sonos speakers in the master bedroom were so hit or miss on AirPlay that I almost gave up on even having speakers there. I wanted more outdoor cams, but the one at the base of the driveway was at an anemic -80 dBm signal.
Surprise! Maintenance Day
Comcast had a habit of doing more “scheduled maintenance” in the middle of my workday, which is fine when you’re casually browsing and not fine when you’re on-call primary and oops, a sysadmin at us-east-1 fat-fingered an extra zero and Kinesis shit the bed for 16 hours on Thanksgiving (too soon? Too soon).
Primo AirBnB
I’ve been preparing the house to be an AirBnB rental. I thought I might target remote workers visiting Portland. A big selling point would be fast, reliable internet.
Enterprise Kit
Around the same time, a coworker mentioned he had a stack of extra networking gear sitting around. One conversation later I had a pile of switches, APs, and a controller landing on my doorstep, and I was committed.
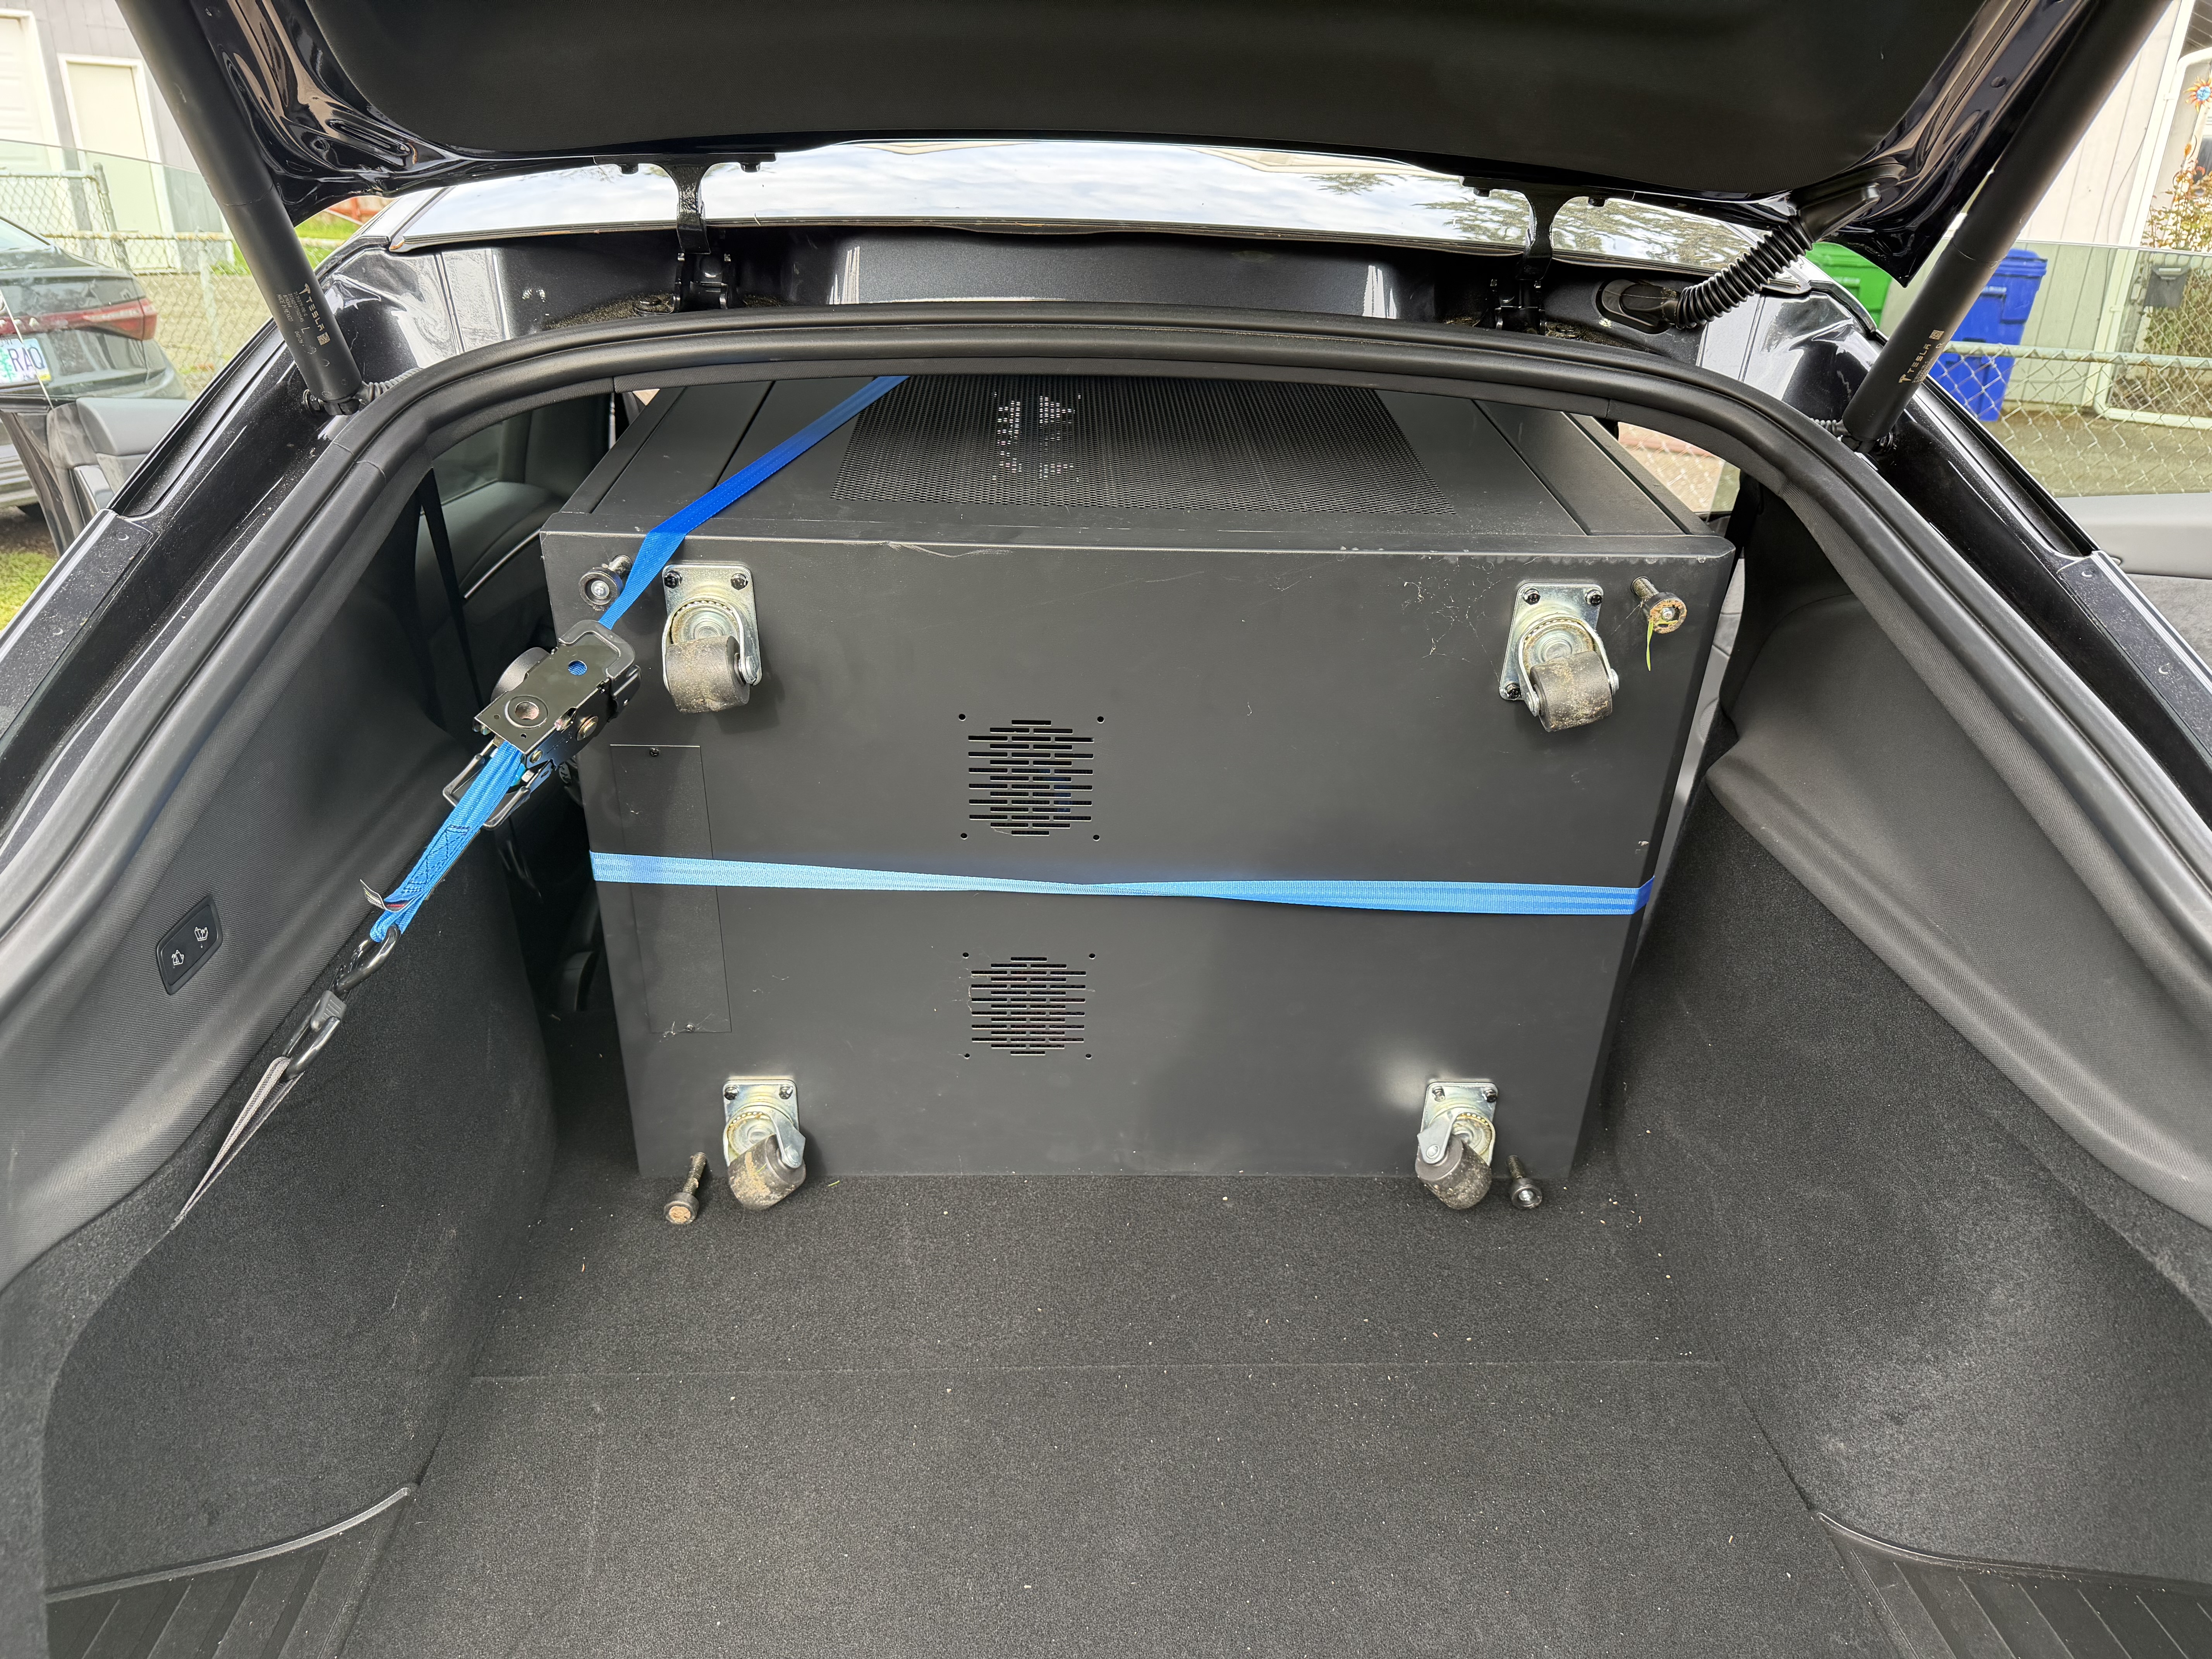
The rack
First thing I needed was somewhere to put all of it. I found a Startech rack on Facebook Marketplace — a nice unit that normally runs about $800, which the seller had found in his company’s storage unit and flipped for $200. Sold.
The rack lives in the gym now and holds the gateway, the controller, the switches, the NAS, the Talos node running my homelab Kubernetes cluster, and a small UPS keeping the critical pieces alive through short outages. It’s a lot of blinking lights in a room most people would just use for treadmills. It’s also a lockable rack, instead of the open one I had before. Necessary for AirBnB guests so I could open up the gym for their use.
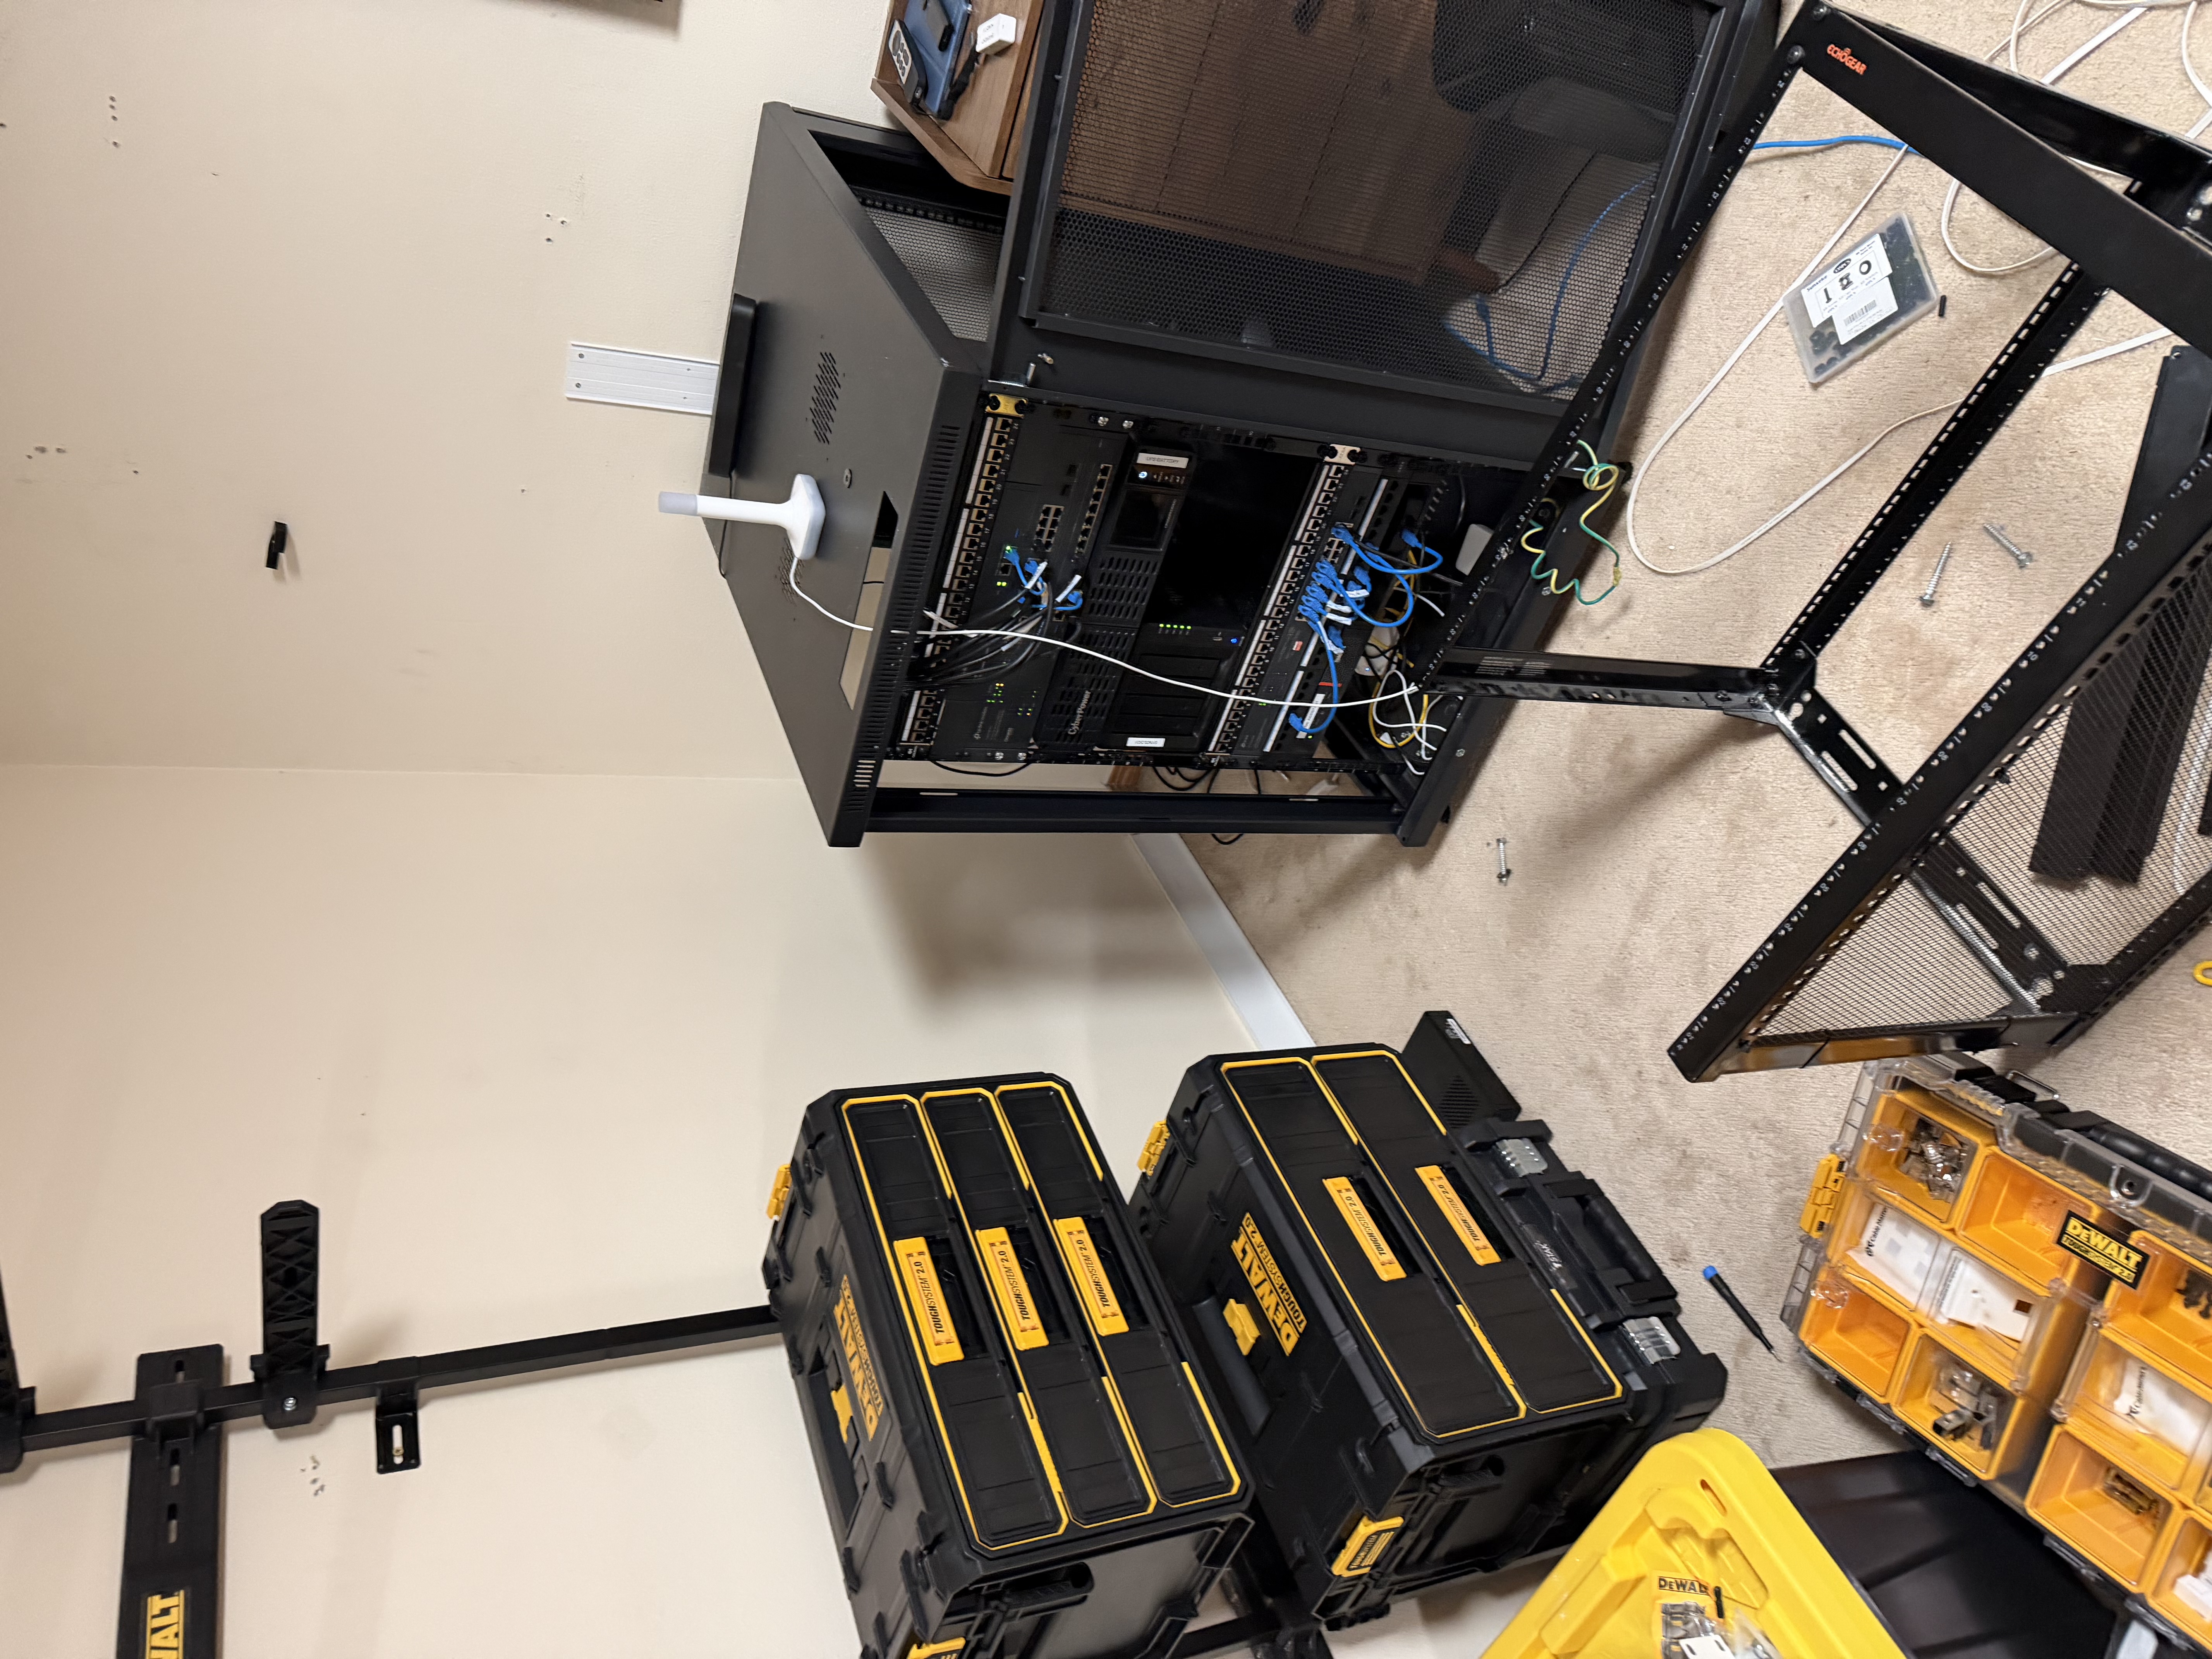
Work in progress. Out with the old, in with the new.
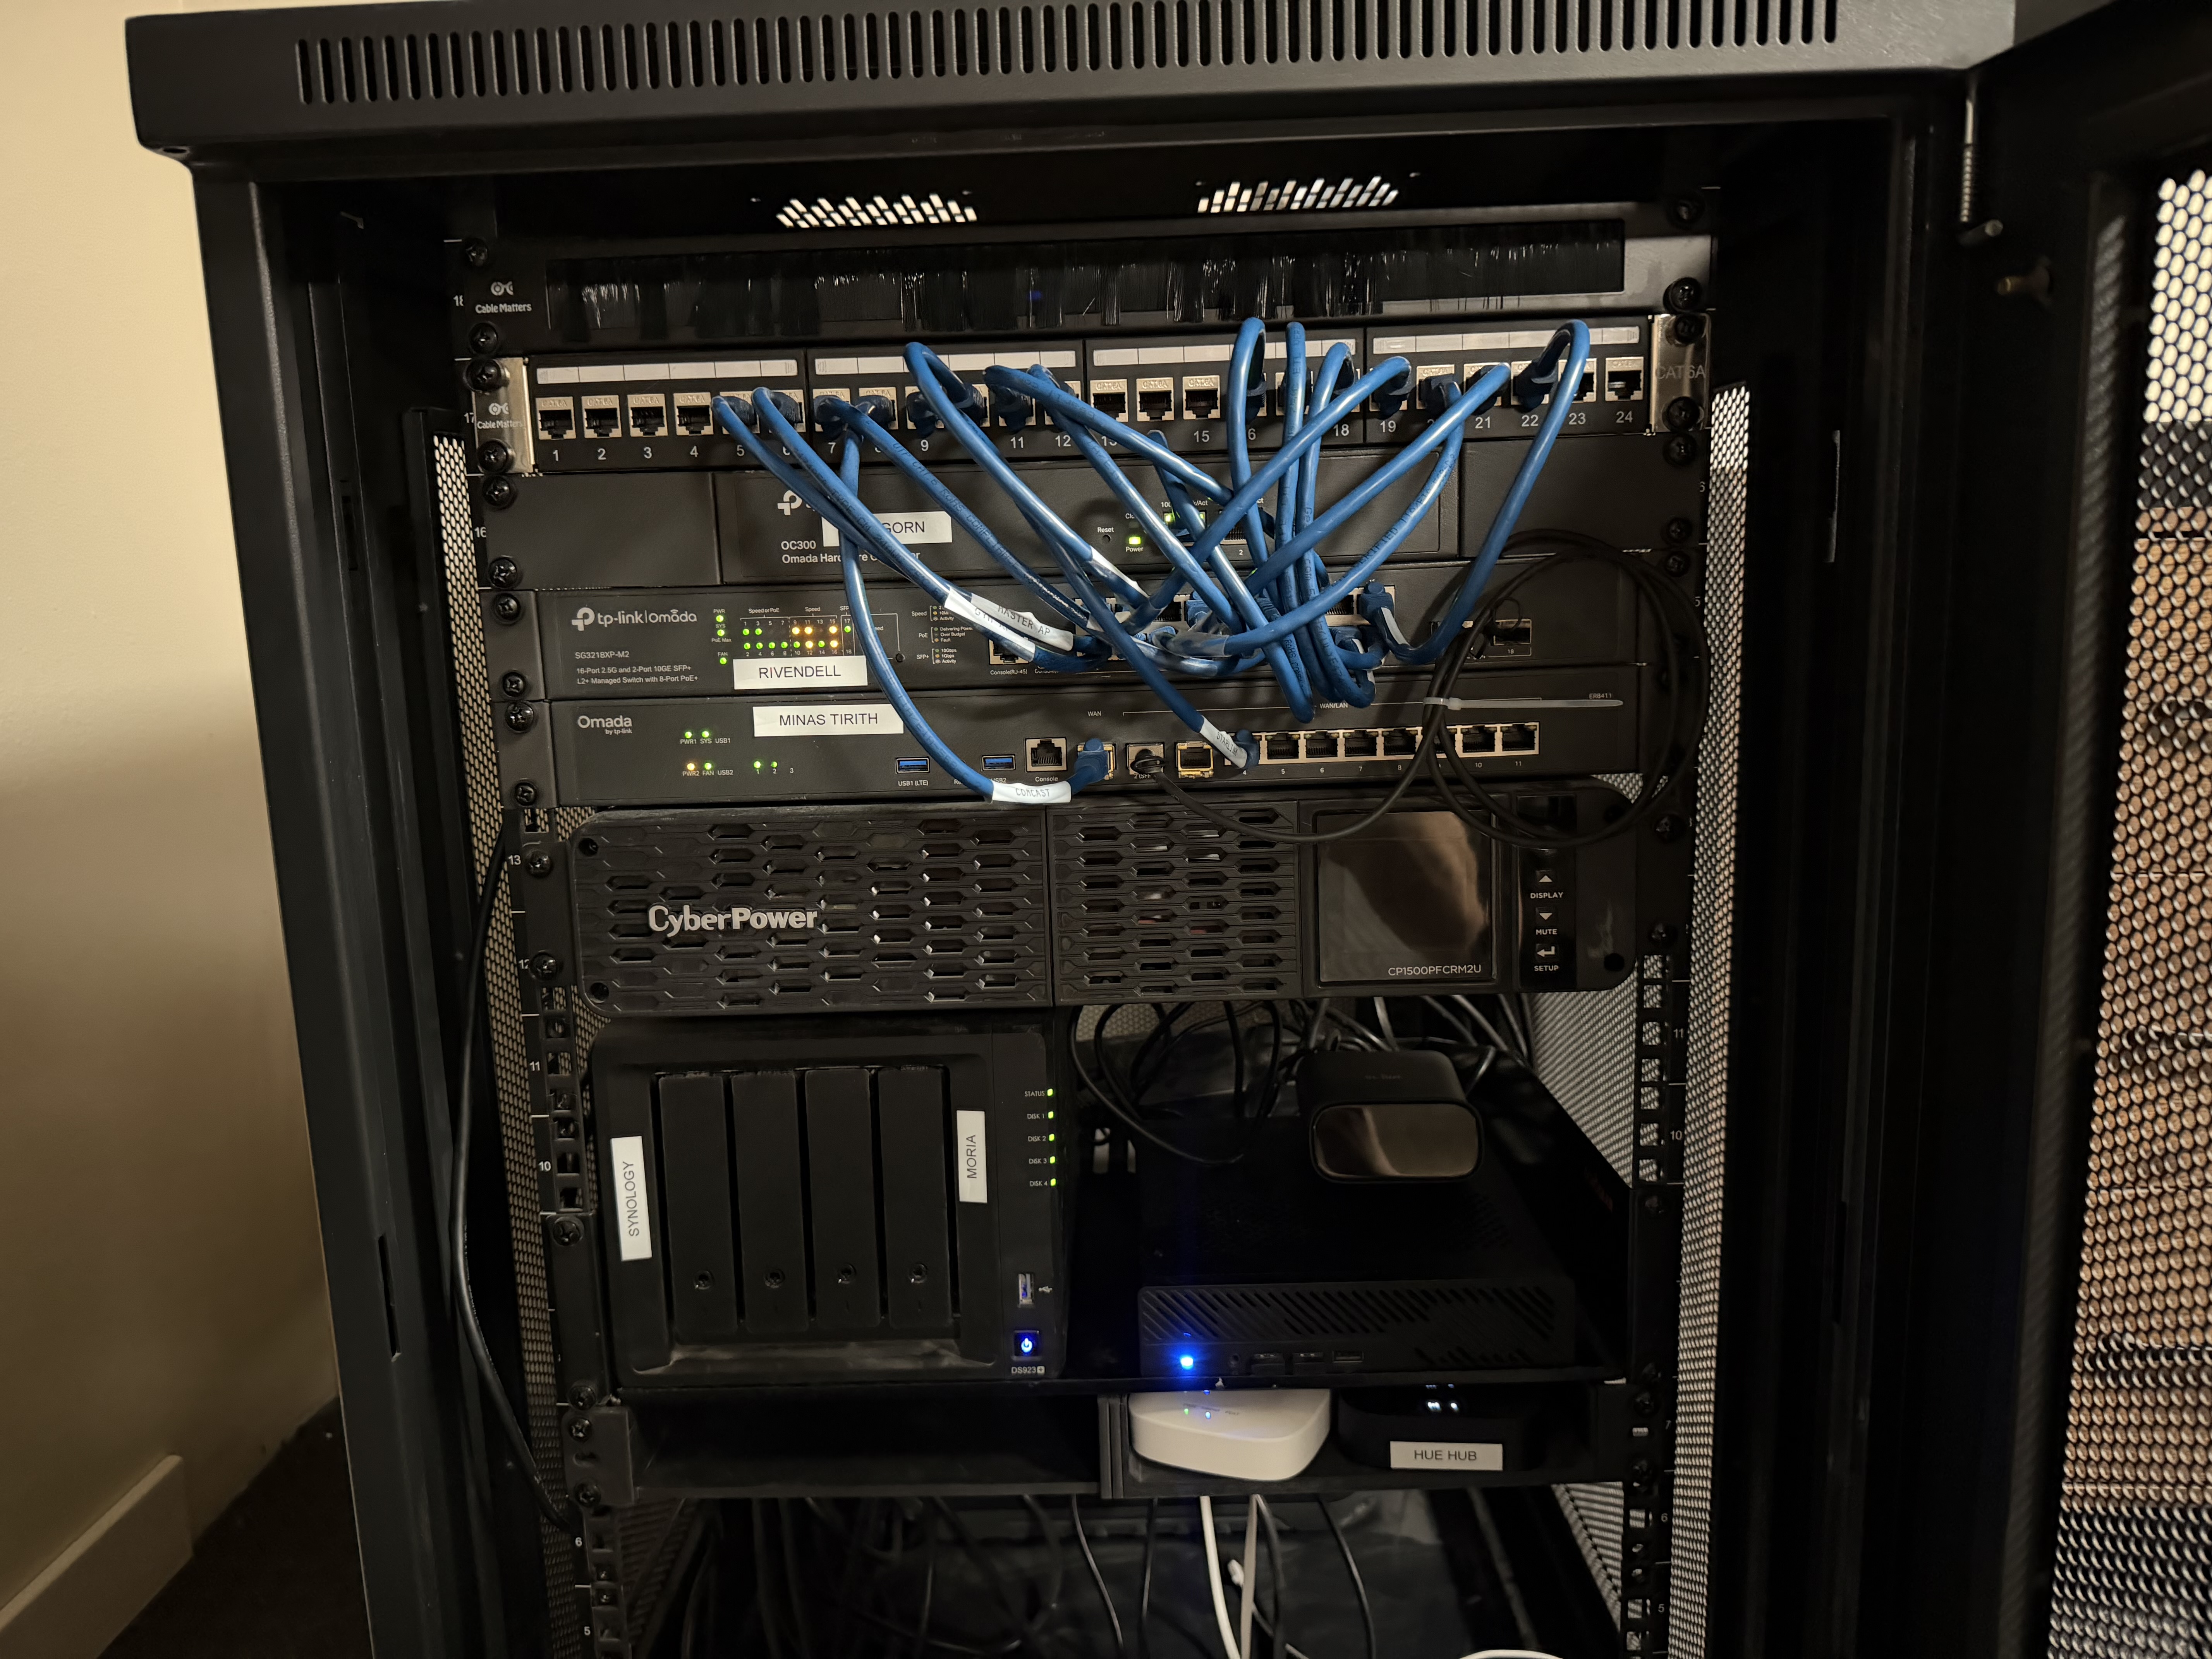
The completed rack. Everything gets a Middle-earth label: ARAGORN the controller, RIVENDELL the switch, MINAS TIRITH the gateway, MORIA the NAS.
Hub-and-Spoke Architecture
The architecture is hub-and-spoke. The gym rack is the hub. From there, I ran each cable straight up to the attic and then dropped it to where it was needed. I’d never crimped before, and it sucked. Sore thumbs.
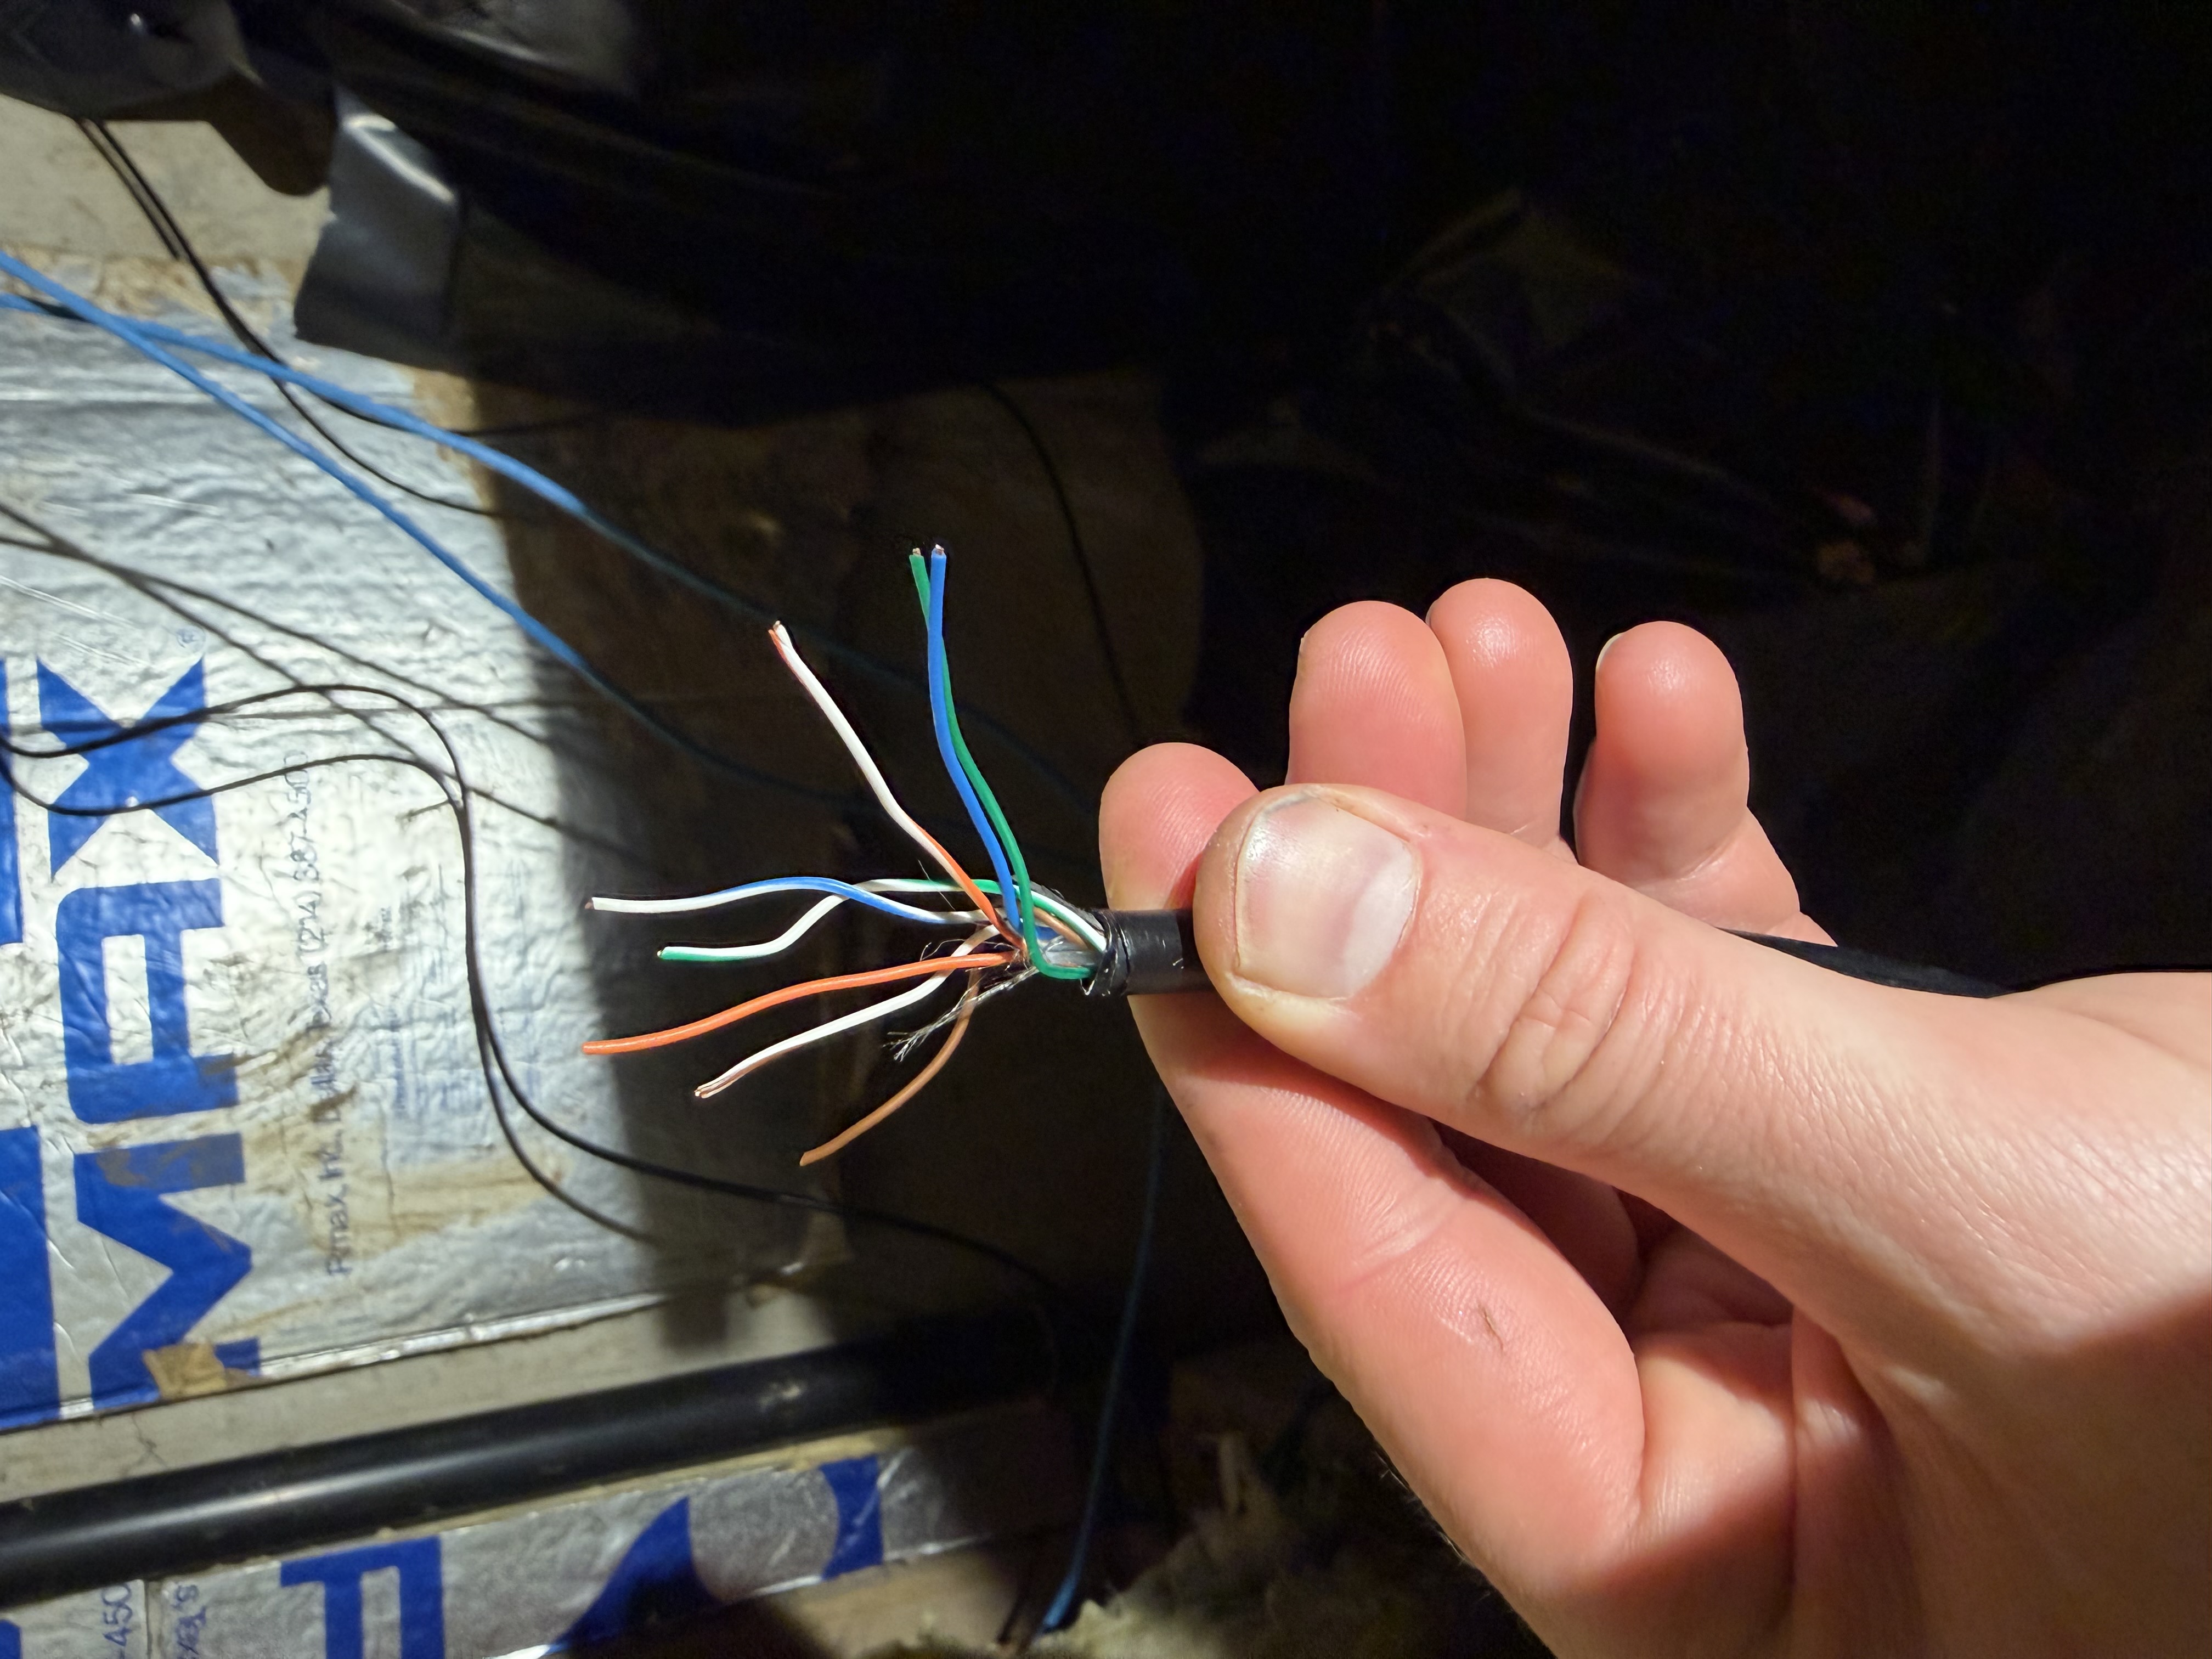
My first crimp attempt. Or rather, the chaos right before my first crimp attempt. Hours of this, and I had nothing to show for it but sore thumbs.
But then I found these field termination plugs that were great, and I use them religiously now.
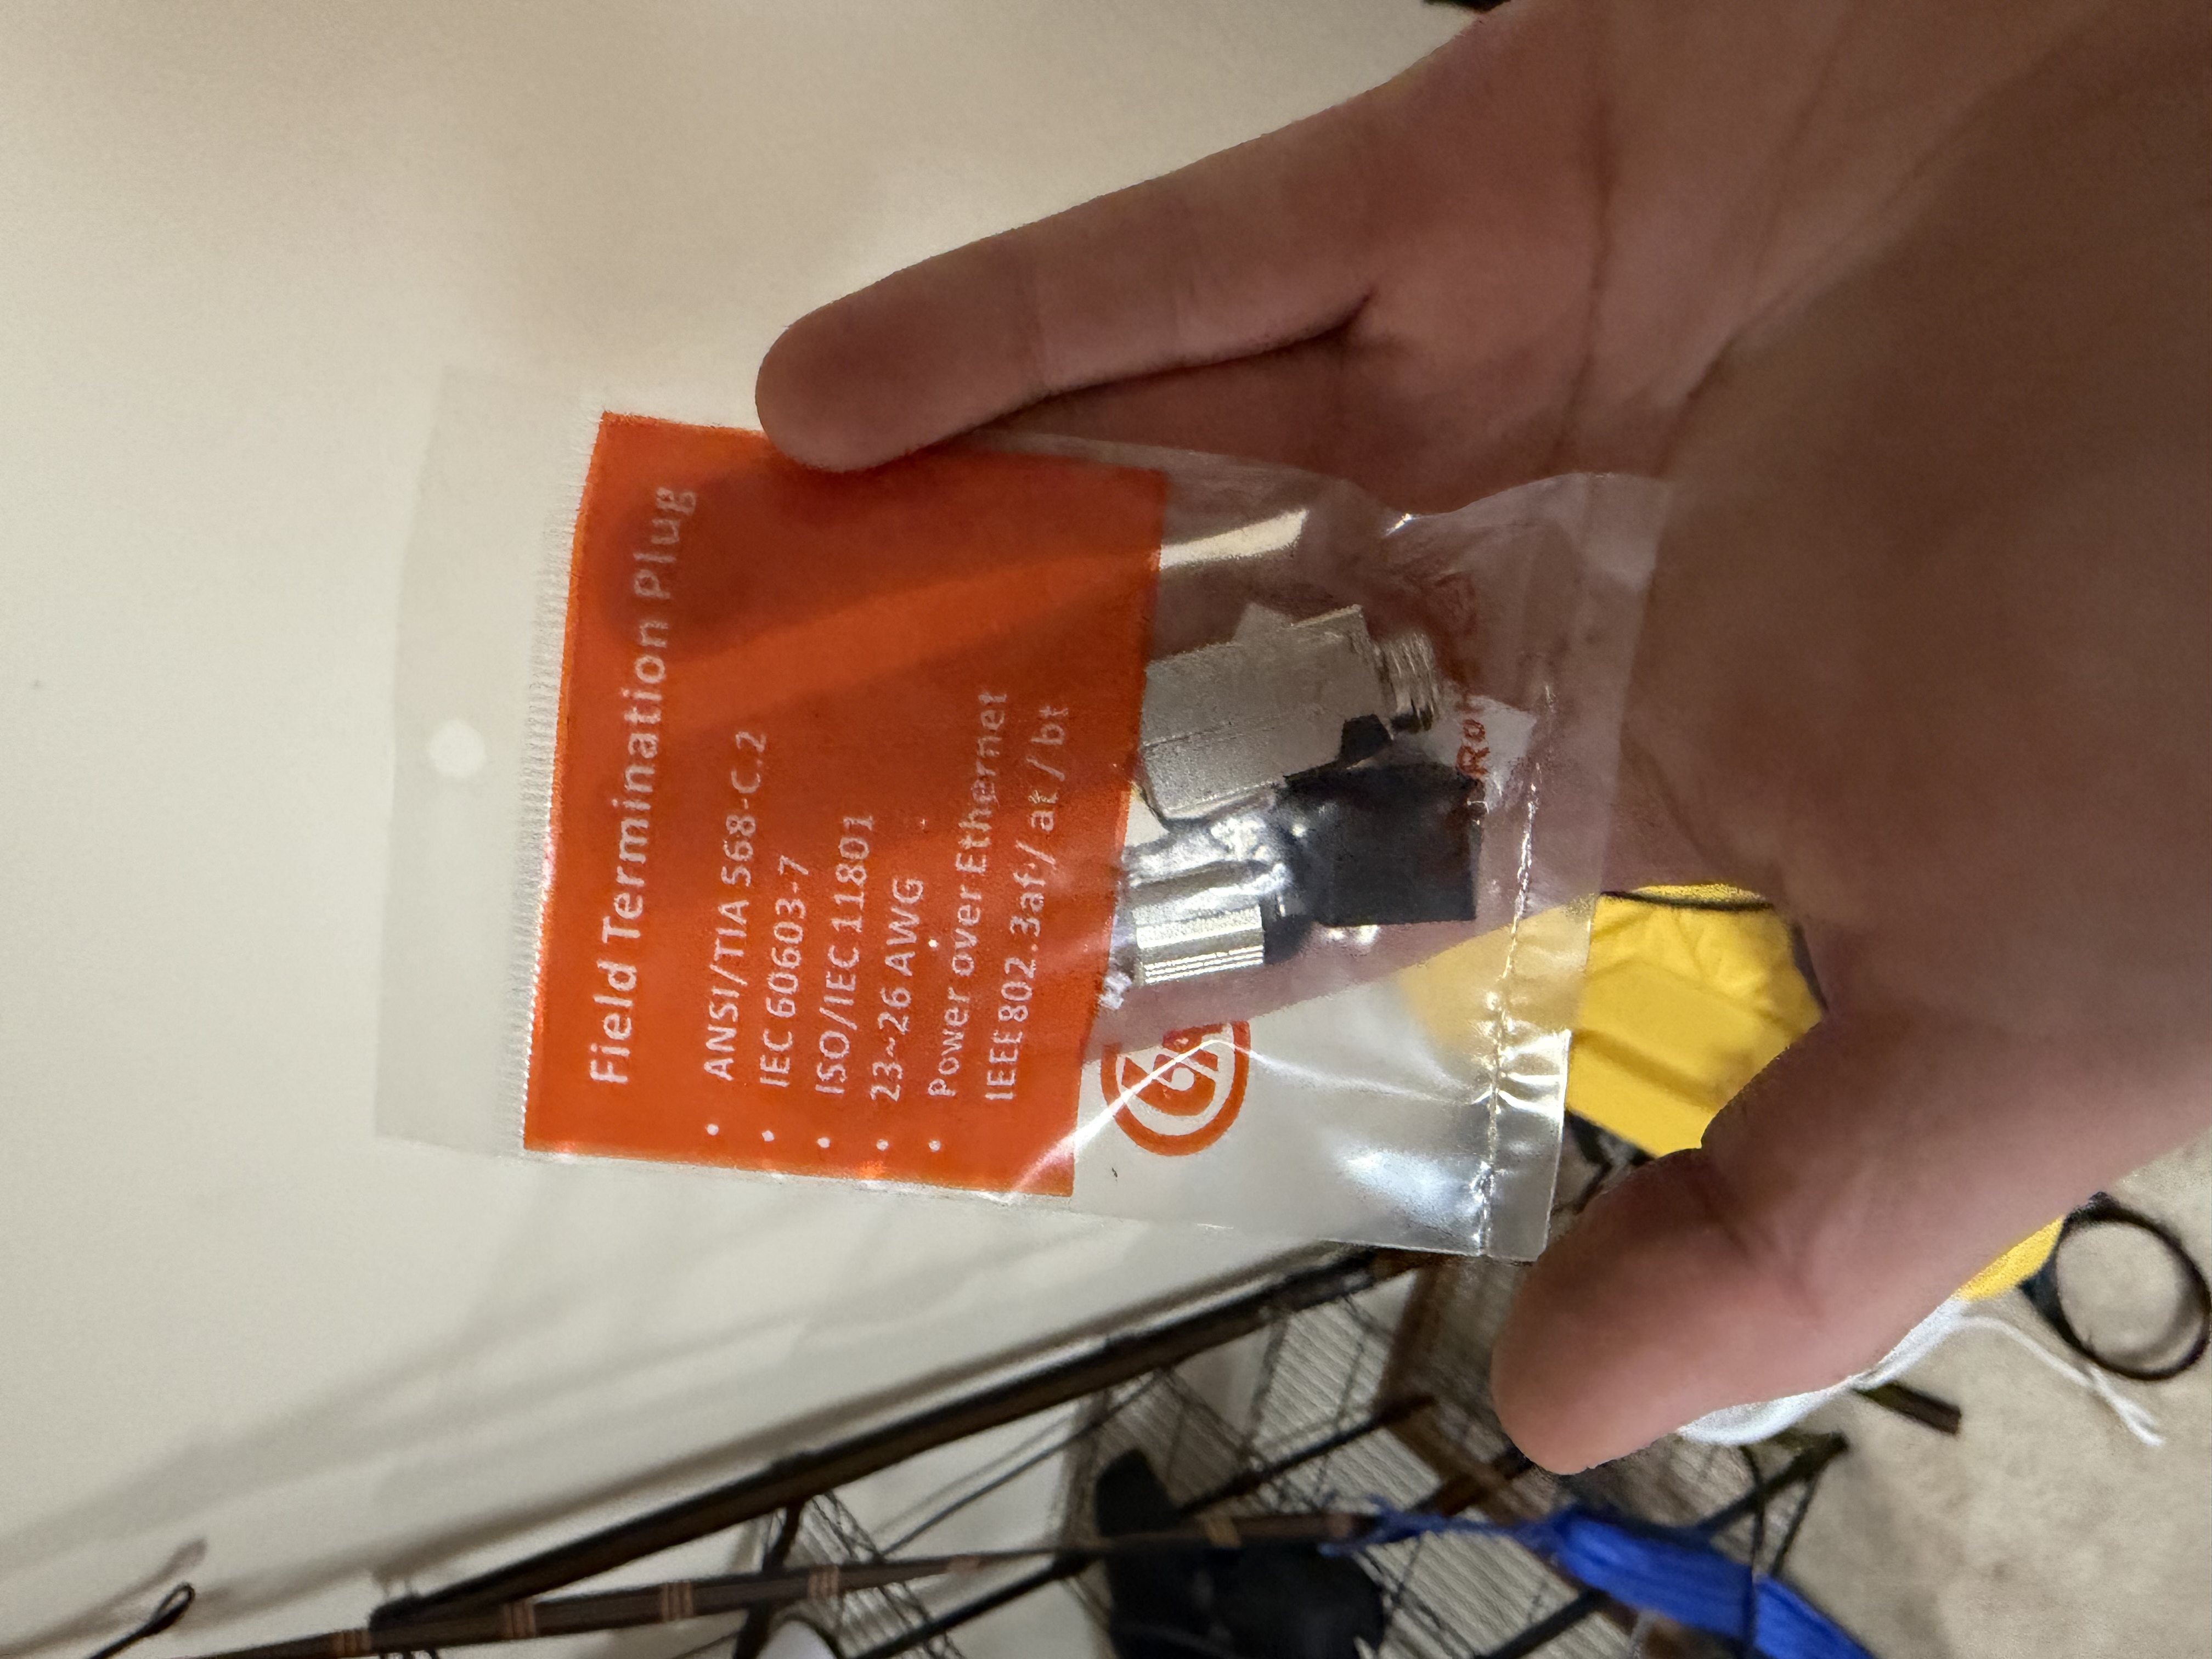
The field termination plugs. No crimping, no tears. PoE rated up to 802.3bt.
Right now there’s just one spoke—a switch in my office. Long-term plan is to add more spokes as the build grows: probably the master, possibly the garage, maybe a future outbuilding. Spokes are cheap to add once the backbone is in the wall; the expensive part is pulling the cable.
The hardware
| Component | Notes |
|---|---|
| Gateway | TP-Link Omada ER-series |
| Controller | TP-Link Omada OC300 |
| Switch (hub) | TP-Link Omada SG3218XP-M2 — 16× 2.5G + 2× 10GE SFP+, 8× PoE+ |
| Indoor APs | TP-Link Omada EAP773 (WiFi 7, BE11000, 10G PoE+) in the office, master, gym; EAP660 HD (WiFi 6, AX3600, 2.5G PoE+) in the family room |
| Outdoor APs | TP-Link Omada EAP772-Outdoor (WiFi 7, BE11000, IP68) |
| WAN 1 | Comcast Business (static IP) |
| WAN 2 | Starlink (failover / load-balance) |
Why Omada
Picking the ecosystem was the biggest decision. I landed on TP-Link’s Omada line for three reasons:
- Less friction. Gateway, controller, switches, indoor APs, outdoor APs — all one ecosystem, one UI, one place to provision.
- Terraform-able and API-driven. Omada exposes an Open API for everything — SSIDs, VLANs, ACLs, port profiles, firewall rules. You can drive it from code instead of clicking through menus. That mattered because the next thing I was going to do was build agents on top of it.
- Remote management. The controller is reachable from outside the house through Omada’s cloud, so I can adjust the network from anywhere without standing up a VPN just to manage it.
The controller is a dedicated OC300 appliance — a little box that sits on the rack and runs the whole show. I used to run the controller as a Docker container, which worked but was finicky. Moving to dedicated hardware means the network keeps running even when I’m tearing down the rest of the homelab.
Layer 3
For wireless to actually be fast, the access points have to be wired. Mesh works by repeating the signal between nodes, and every hop costs you. That was the real bottleneck.
The nice thing is PoE. Network cables can carry power. And low-voltage work has way fewer code requirements than line voltage, so it’s mostly a matter of keeping the runs protected.
The runs are a mix of CAT6A and CAT7, all rated to carry 10G comfortably over the distances inside my house, with the switching to back it up. Probably overkill, but hey — the cables are in the walls now, and pulling new ones is the expensive part.
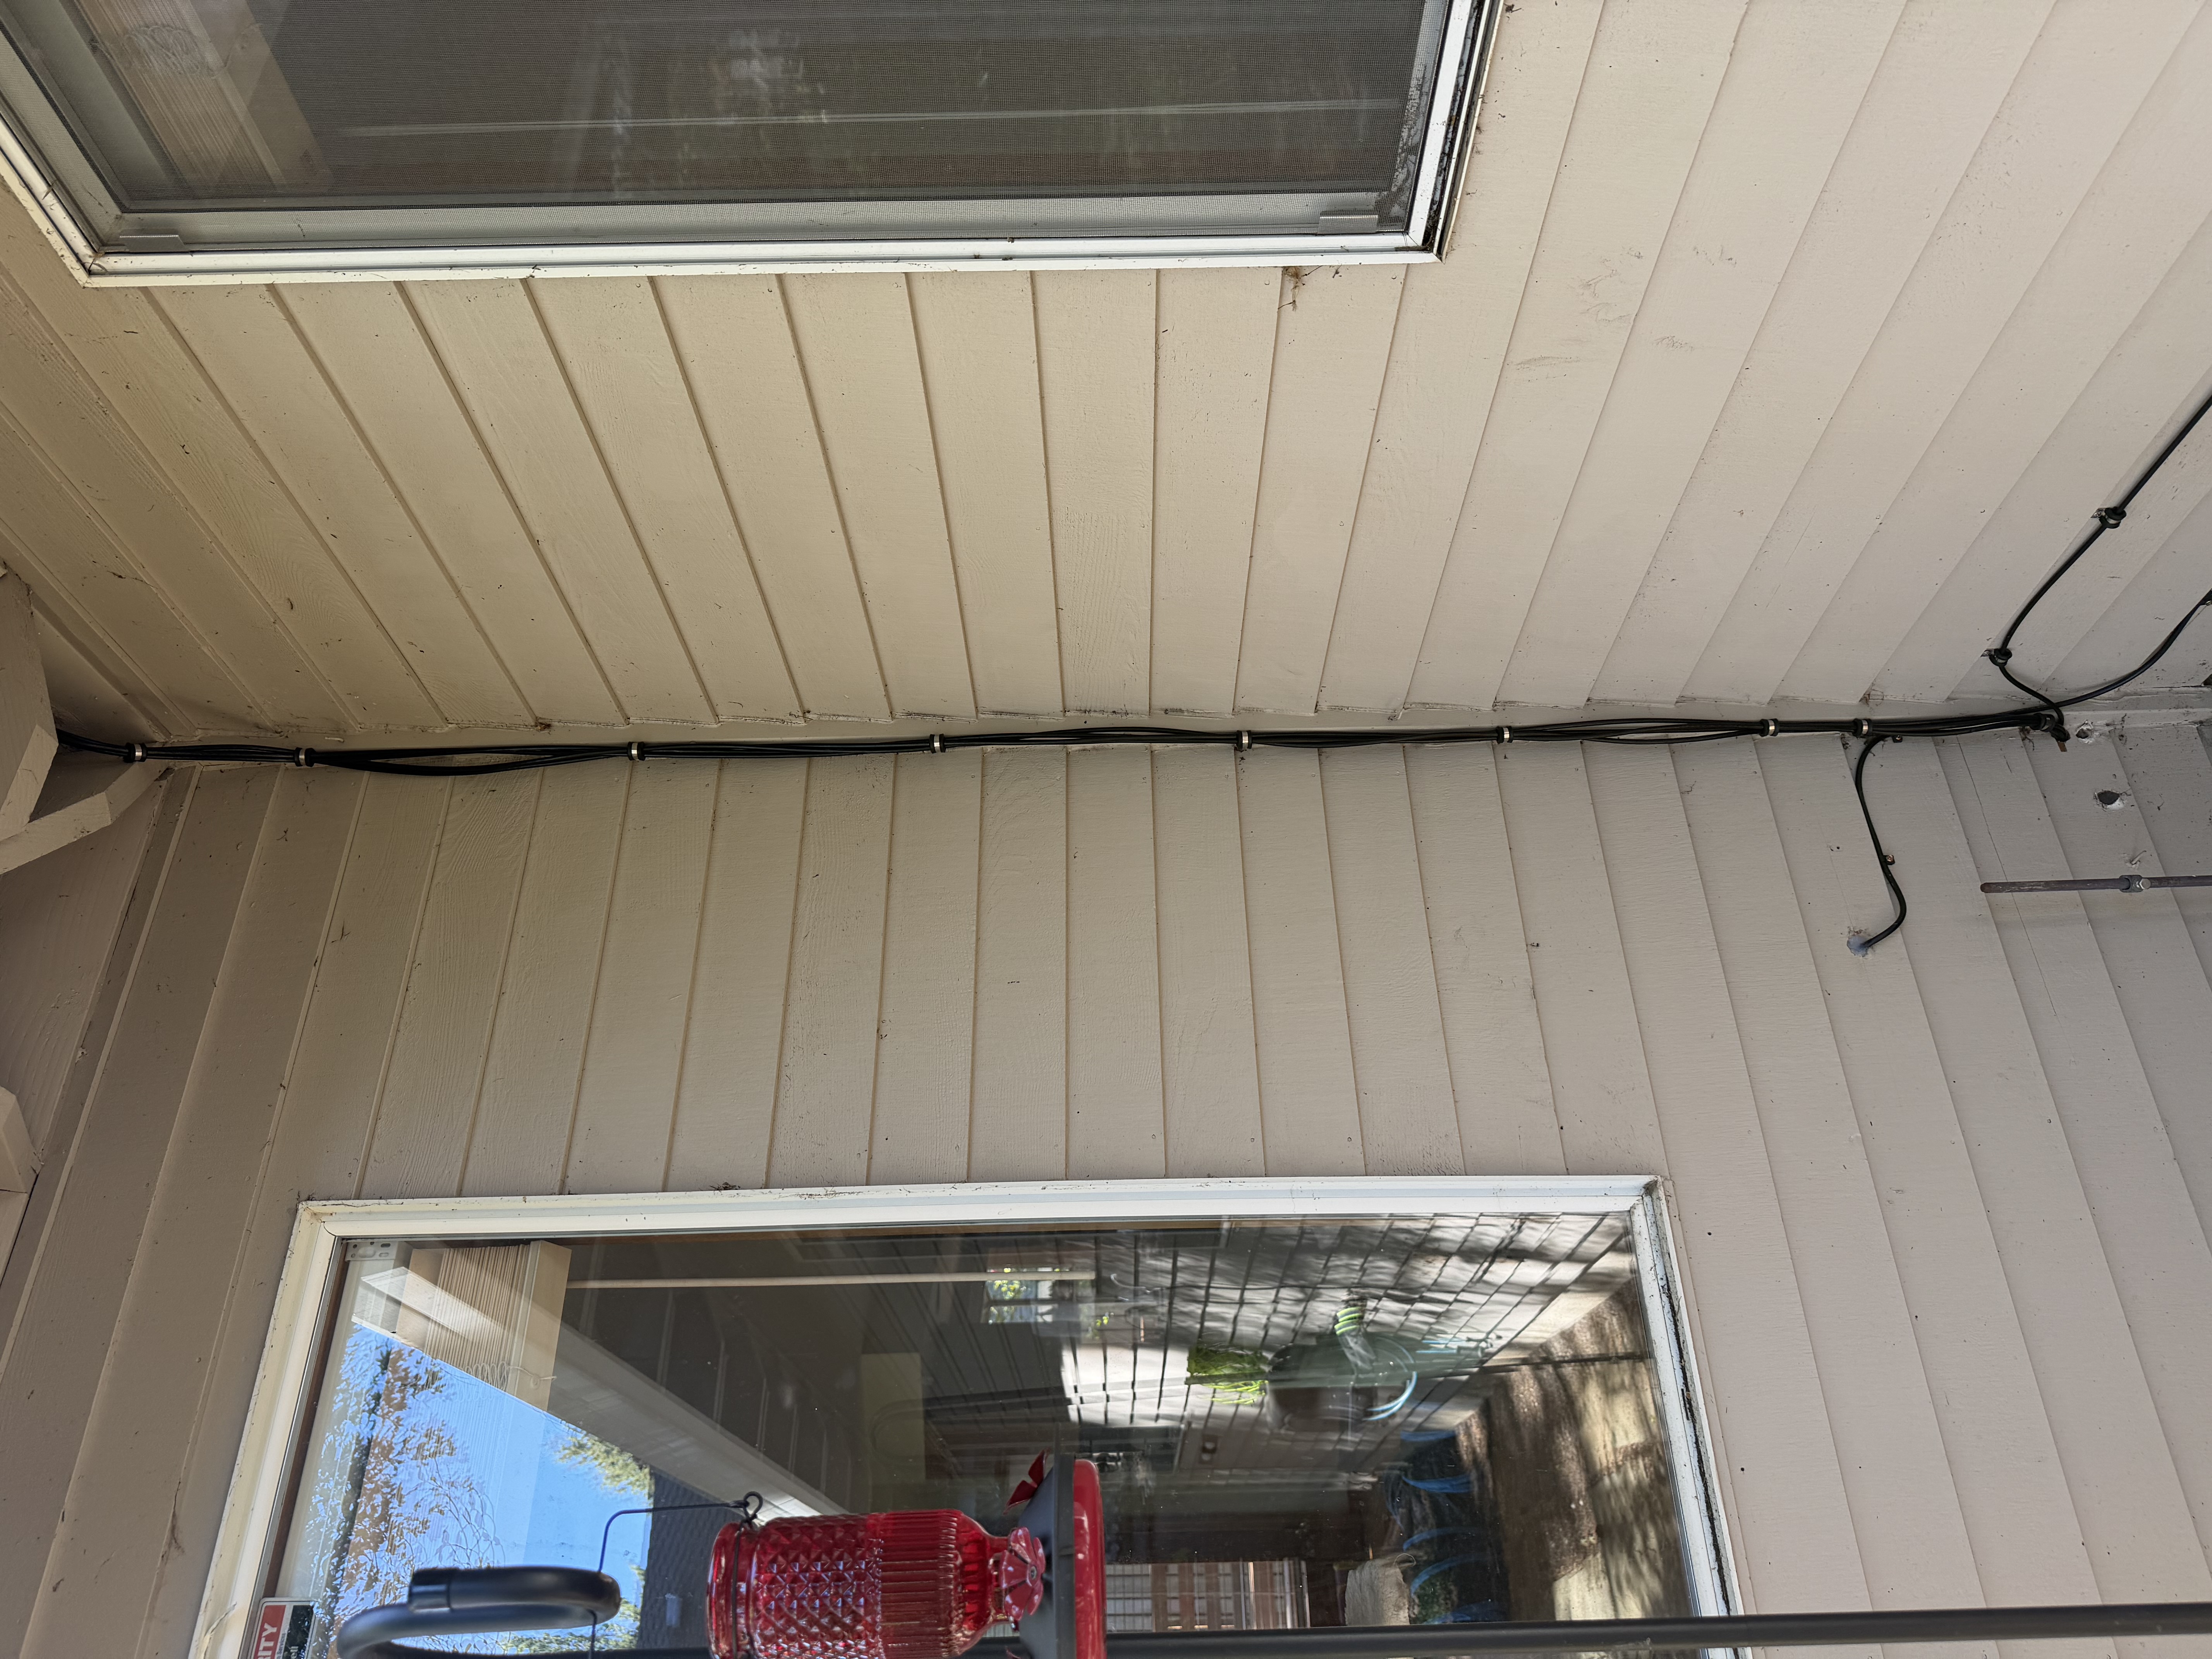
One of the exterior runs, cleaned up. Out of the attic, around the eave, clipped straight down the corner.
A few things I’d tell past me:
- Get the right termination tool on day one. Pre-organizes the wires for you, no more thumb cramps.
- Buy the spool, not pre-made cables. You will always need a different length than the one you bought.
PPSK and VLANs
For Wi-Fi I went with PPSK — Private Pre-Shared Keys — instead of a wall of separate SSIDs.
The way it works: there’s one SSID broadcasting on the network. Each device (or class of device) gets its own password. The password the client uses determines which VLAN they land on. Trusted devices land on the data VLAN. Smart-home devices land on the device VLAN. Guests land on the guest VLAN, rate-limited and isolated from everything else.
Why this matters:
- One SSID is cleaner UX. Guests don’t have to know which network is “the good one.” Devices don’t get confused. Phones hand off cleanly between APs because there’s only one network to remember.
- Separation without separate networks. The smart-home zoo can’t talk to my work laptop. The guest network can’t talk to anything inside. But it all looks like one Wi-Fi from the outside.
- Per-device revocation. If a device gets compromised or a key needs to be rotated, I rotate one key. I don’t break the whole network.
It’s the kind of thing that’s overkill for a one-bedroom apartment and exactly right for a house that runs a homelab, a smart home, work calls, and — soon — Airbnb guests on the same physical network.
Backup Internet Connection via Starlink
The “Comcast maintenance during the workday” problem got solved two ways at once.
I upgraded the primary connection to Comcast Business. Same coax going to the same pole, but a business plan instead of residential gets you:
- Static IP, so I can run real services from the house.
- Fast AF, 2.5G down, and prioritized so it’s reliable. Upspeeds aren’t symmetrical yet but they’re rolling it out.
- No data caps.
- Better SLA, with actual humans answering when it goes down.
- No surprise “maintenance” windows during work hours. This was the one I cared about most.
Then I added a Starlink as a secondary WAN.
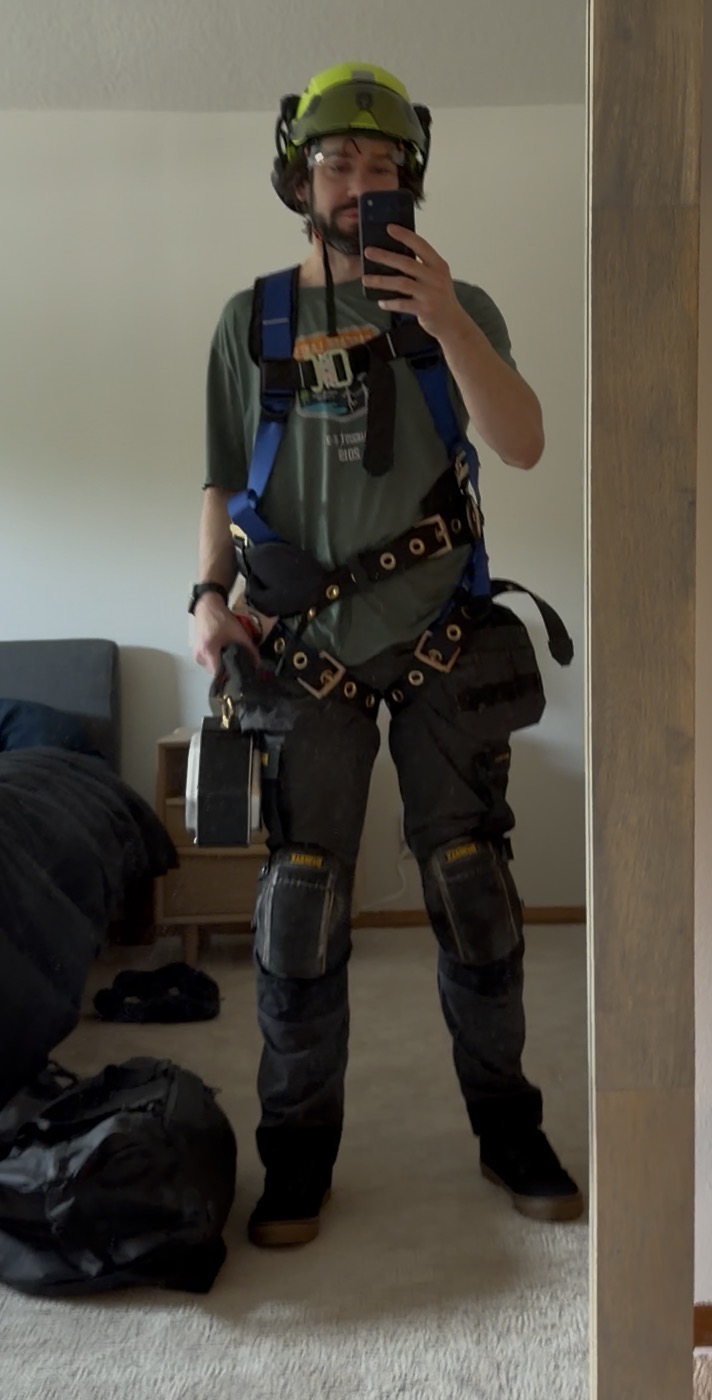
Suited up for the install. The Starlink goes on the roof, the self-arrest system keeps me there as well.
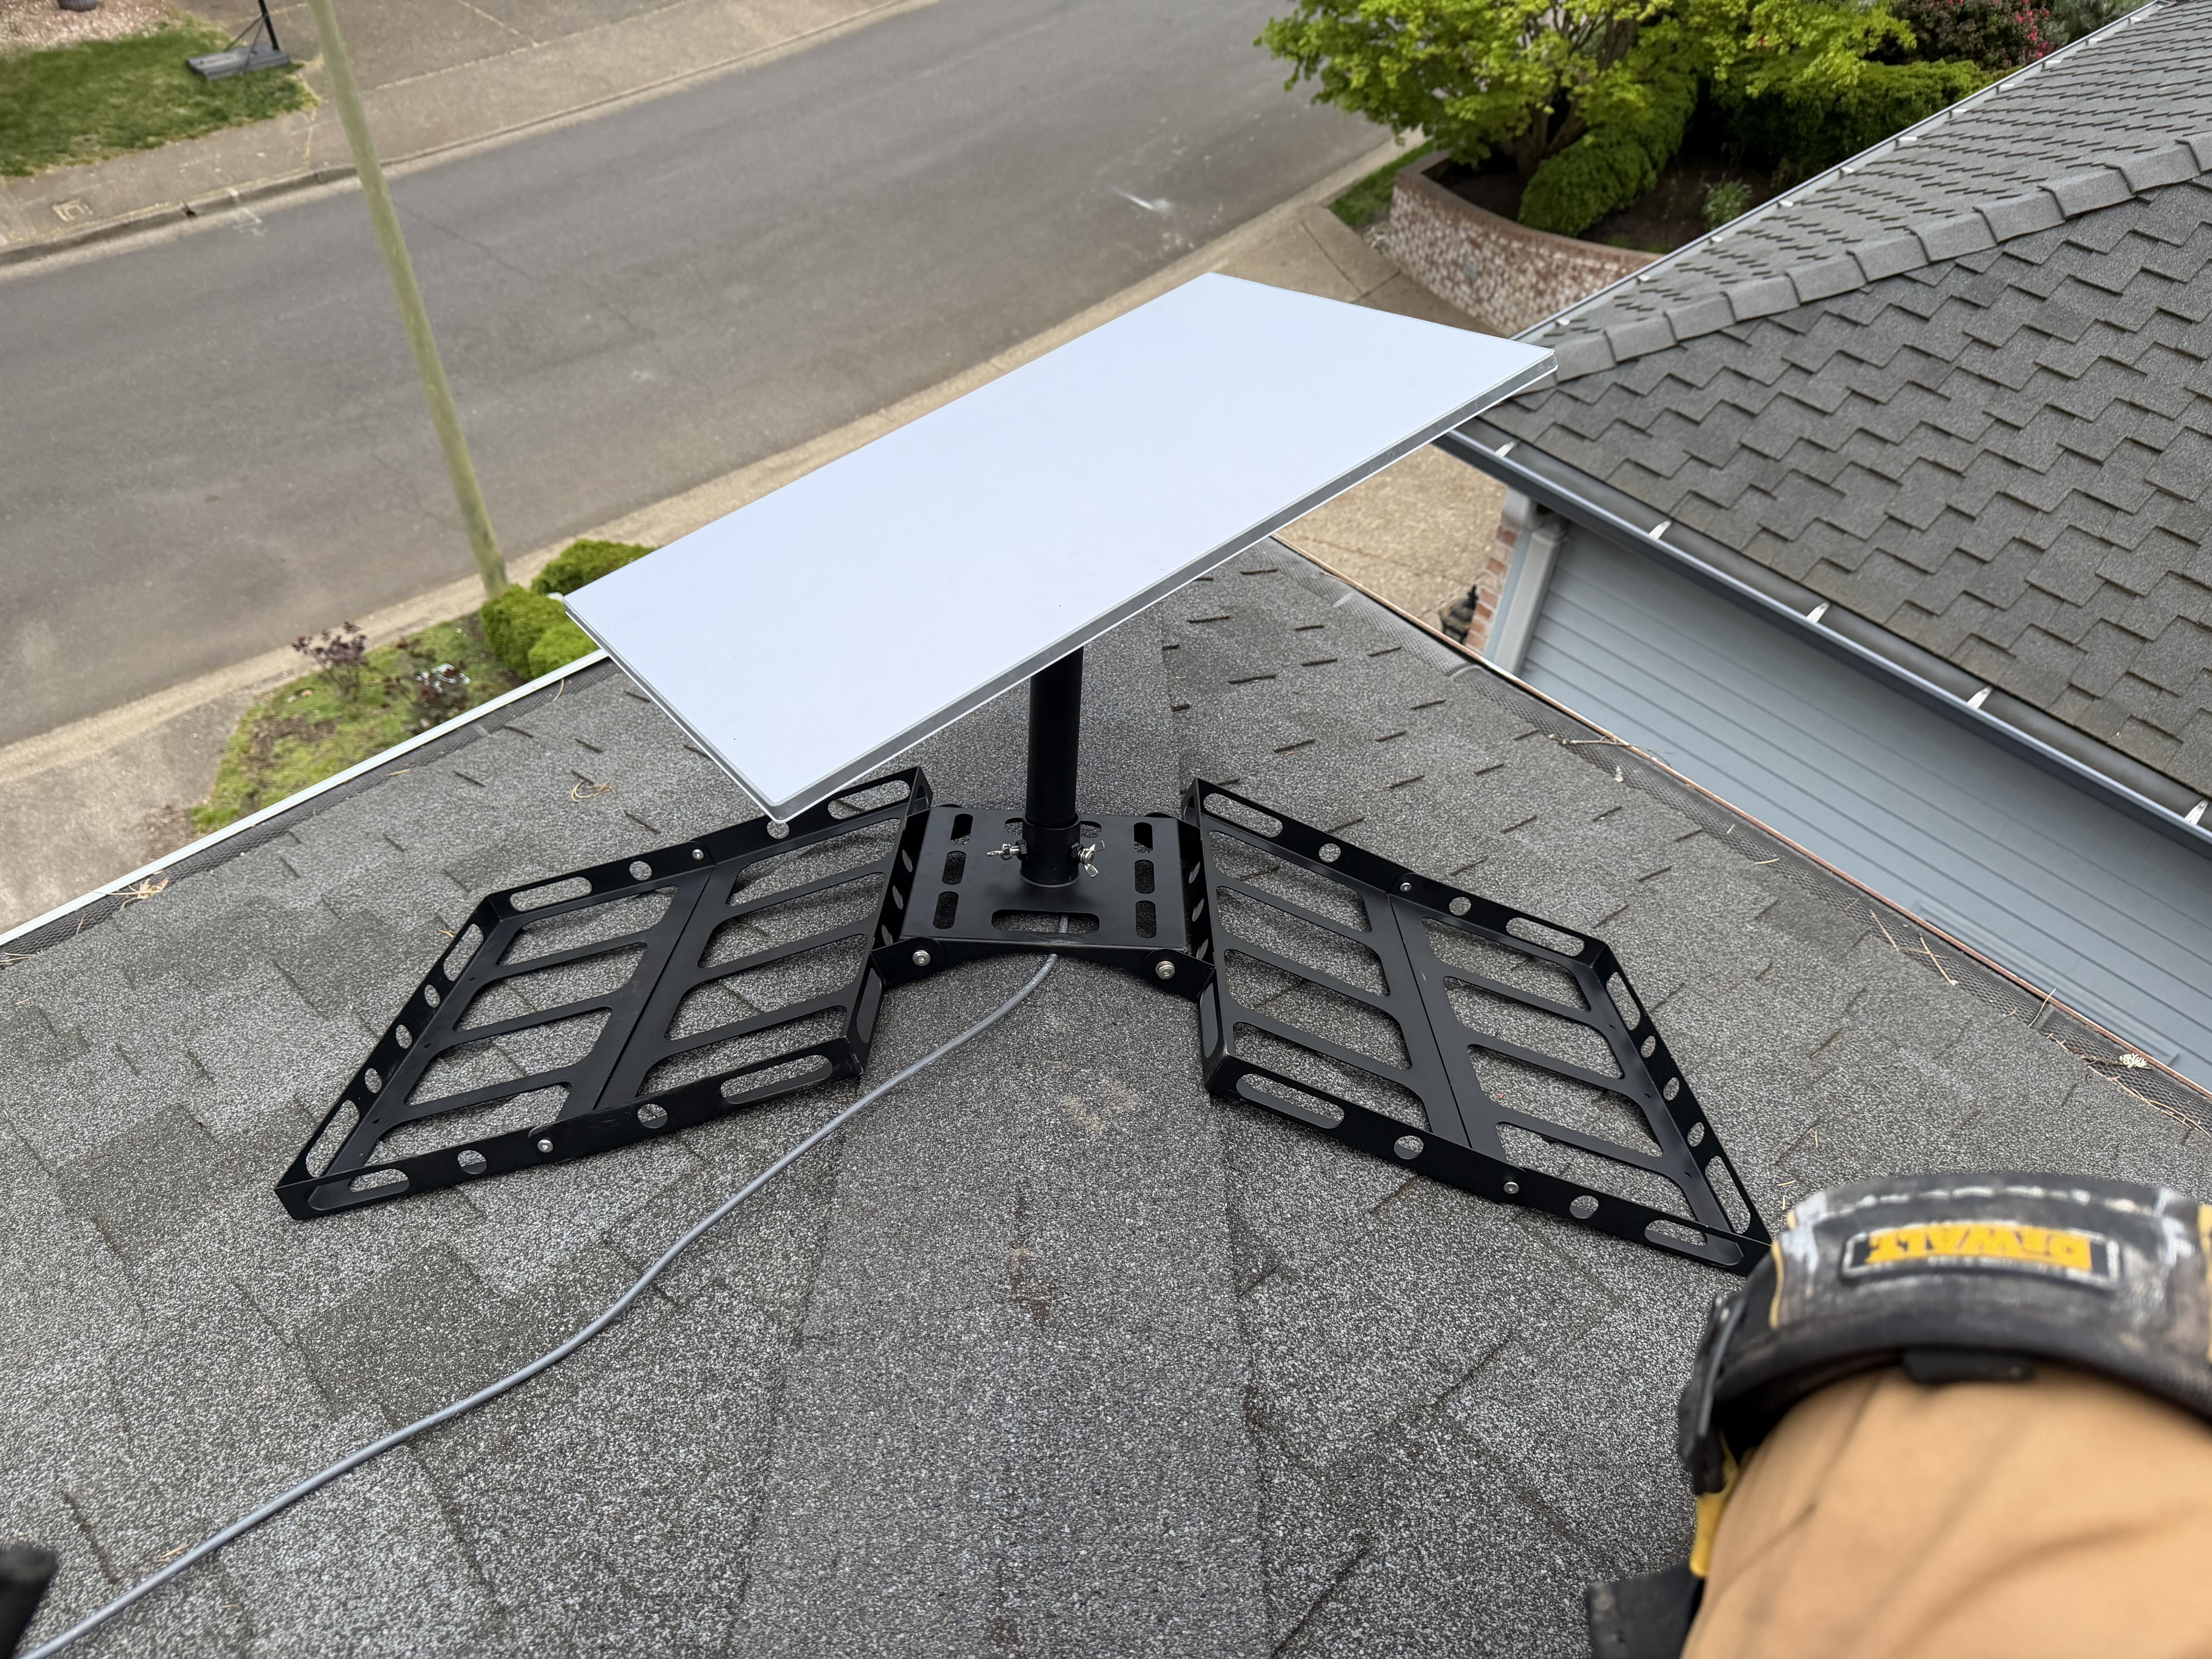
Mounted. Non-penetrating bracket weighted down on the shingles — no holes in the roof.
The Omada gateway load-balances across both WANs. Traffic distributes between Comcast and Starlink, and if one drops, everything keeps flowing on the other.
A note for anyone doing this: Starlink’s router runs its own DHCP service that hands out CGNAT addresses to anything on its broadcast domain. If you don’t isolate it, it’ll fight your real gateway for leases. Ask me how I know. The fix is putting it on its own VLAN, or running it in bypass mode if your firmware supports it.
The Omada ecosystem, in pictures
It’s not just the gateway and the indoor APs. Omada has outdoor units too, and those are mounted up at the eaves to saturate the property.
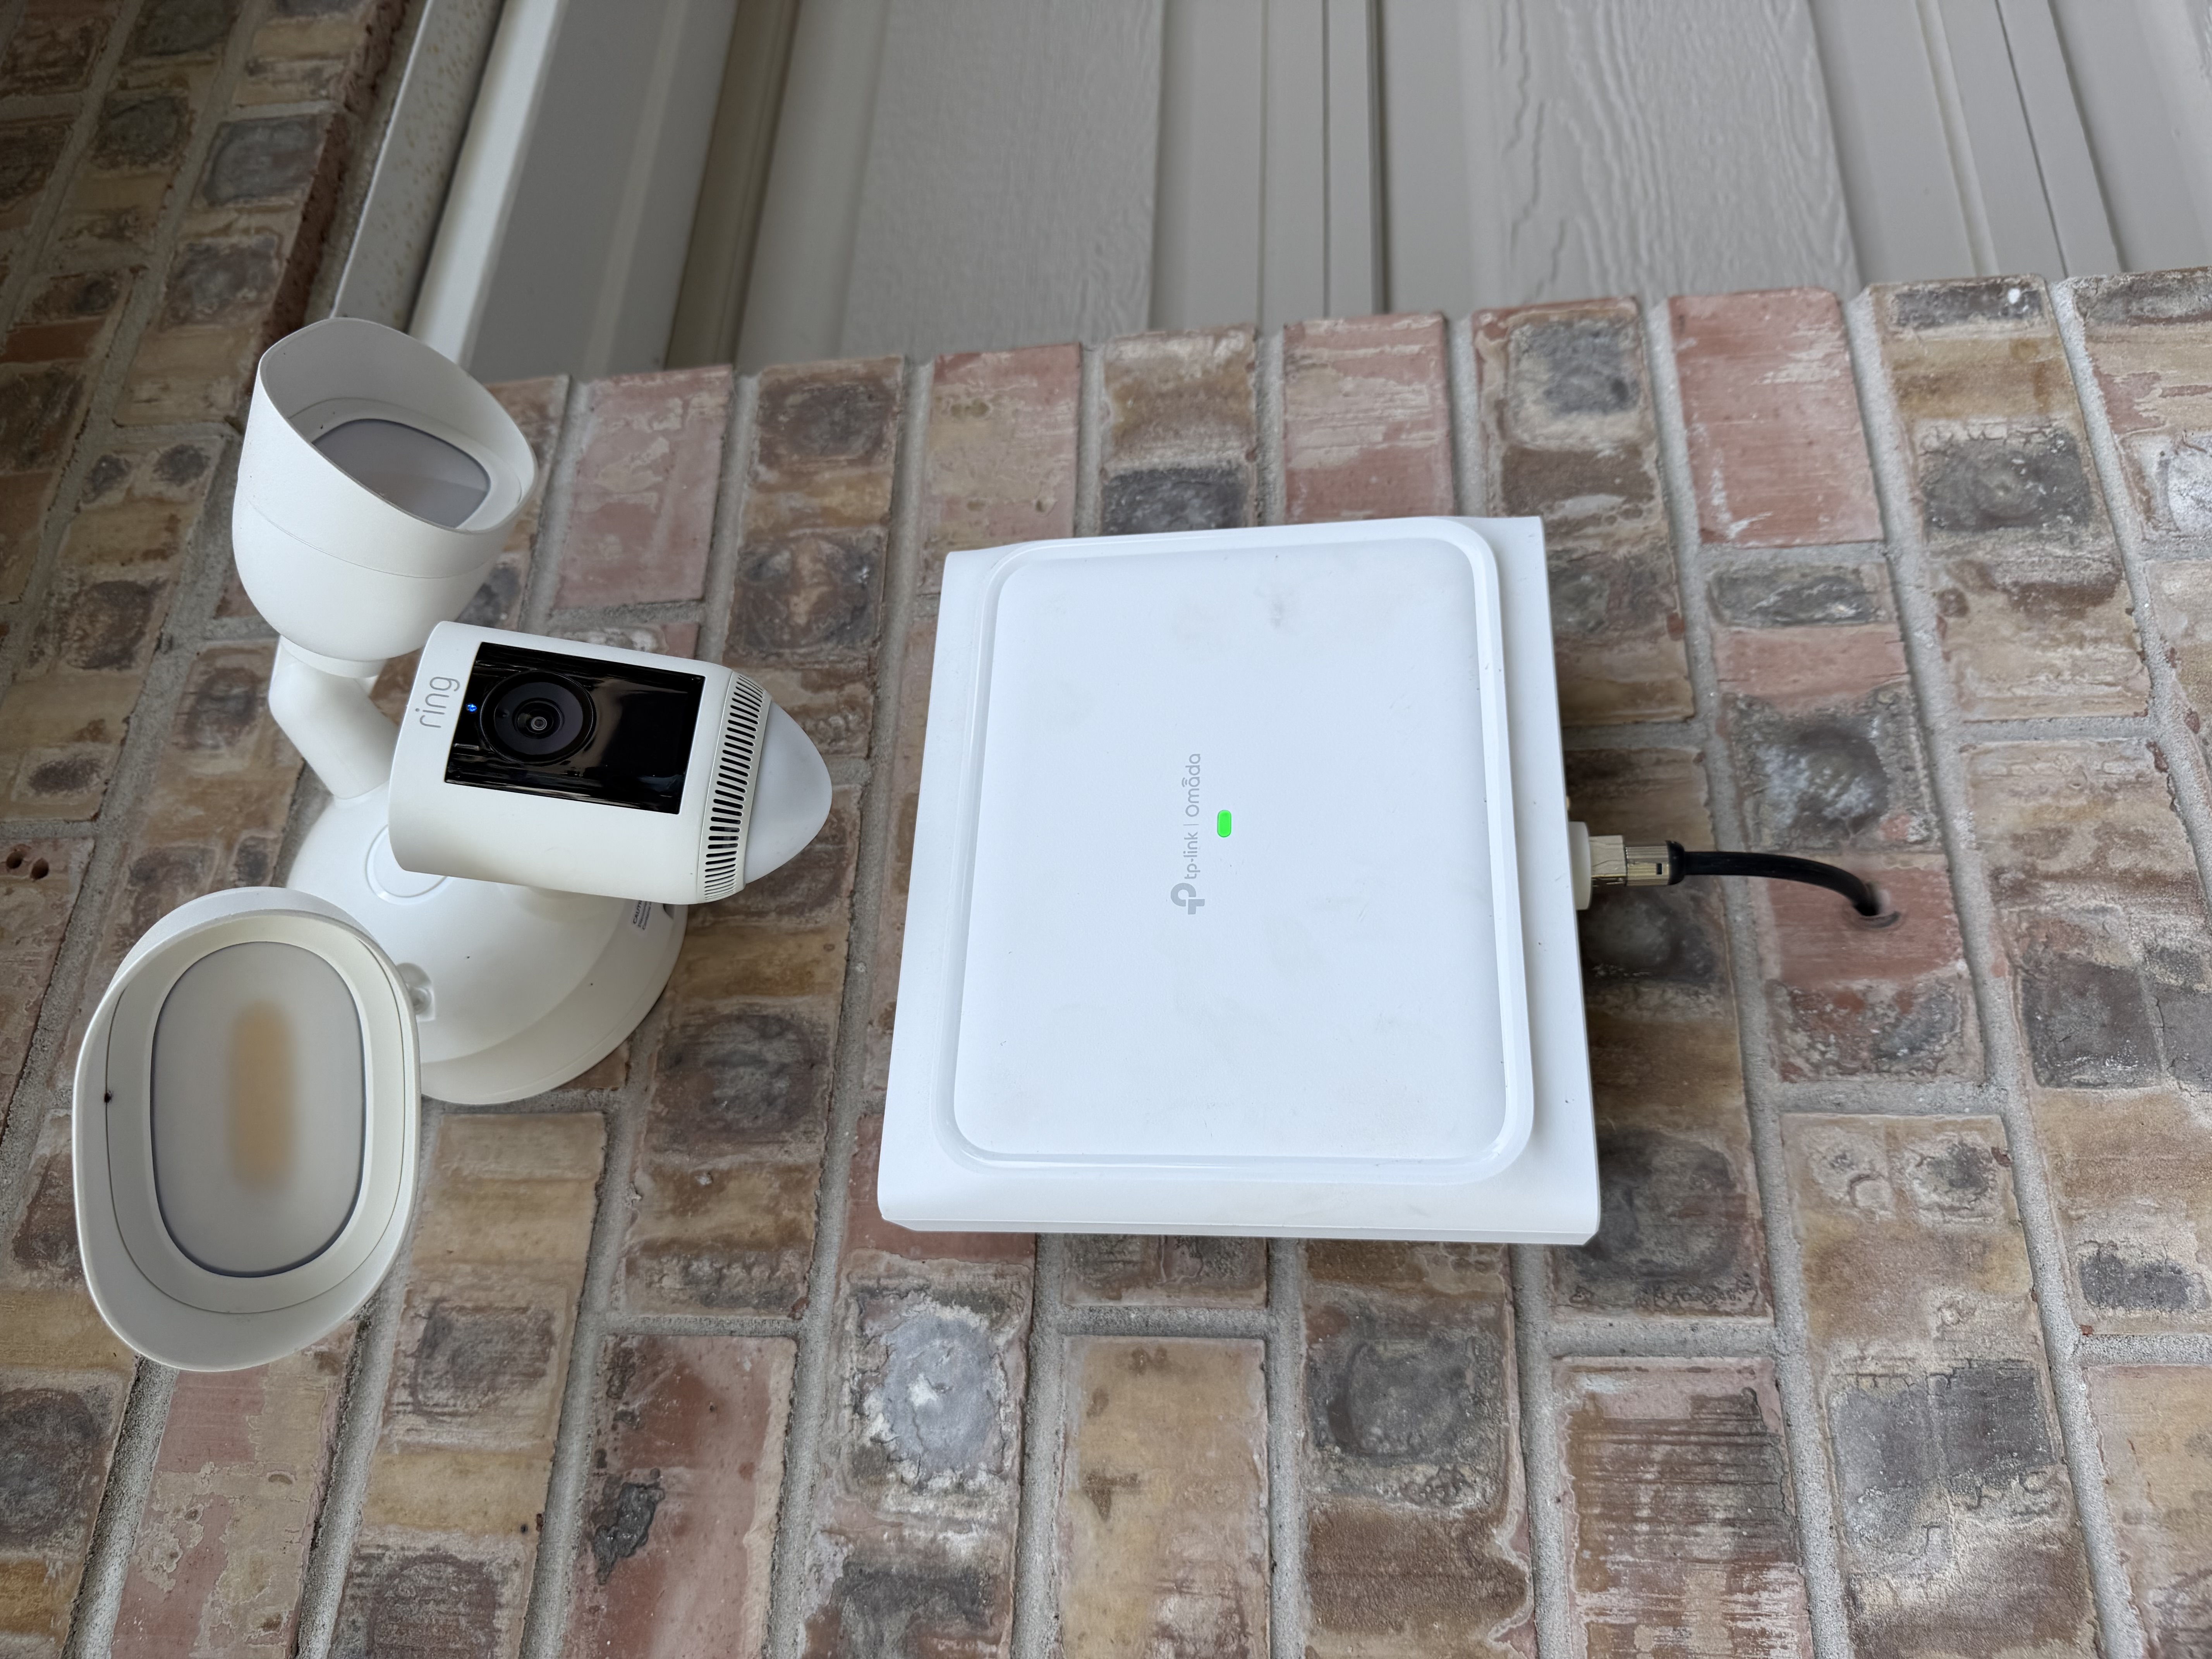
One of the outdoor APs at the eave, sharing a wall with a Ring spotlight cam.
The outdoor coverage turned out to be one of the more interesting parts of the build, and big enough to deserve its own post. I’ll write that one up separately.
A suite of agents
Once the network was real, I wrote a suite of agents to manage it.
The Open API made this possible. Every action a human can take in the Omada UI, an agent can take through the API. That’s the whole reason the ecosystem choice mattered — I didn’t want to be the bottleneck for my own network.
I’ll write up the agent layer as its own post. The short version: pick a vendor with a real API, and your network becomes programmable in ways your past self would have killed for.
The Airbnb angle
The real forcing function for getting all of this right is that I’m setting up part of the property as an Airbnb, targeted at remote workers.
If you’re renting a place to do your job from, the single most important thing — more than the bed, more than the kitchen, more than the view — is that the internet works. Not “kind of works.” Bulletproof. Fast. Always on. The kind of connection you don’t think about because it never makes you think about it.
That meant:
- Comcast Business + Starlink load-balanced, so a single ISP problem isn’t a guest problem.
- Their own VLAN, fully isolated from the rest of the house.
- Their own PPSK so I can rotate keys between stays without touching anything else.
- Full Wi-Fi coverage indoors and out, with no dead spots anywhere on the property.
It’s the kind of network setup that’s overkill for a single home. It’s exactly what I want when somebody is paying for the room.
What’s next
A few things still on the list:
- Tag the inside of the network closet so future-me knows what every cable is for.
- Eventually: Knock out a wall in the basement and add a closet with more dedicated ventilation for the server. But that requires permitting and probably an actual contractor.